Create a charger
Tutorial: open the Create charger sheet and fill every field — identity, access, location, OCPP version, brand, model, and connectors.
This tutorial walks through Create charger in the Dashboard, field by field. When you finish, the charge point exists in your organization and can connect over OCPP.
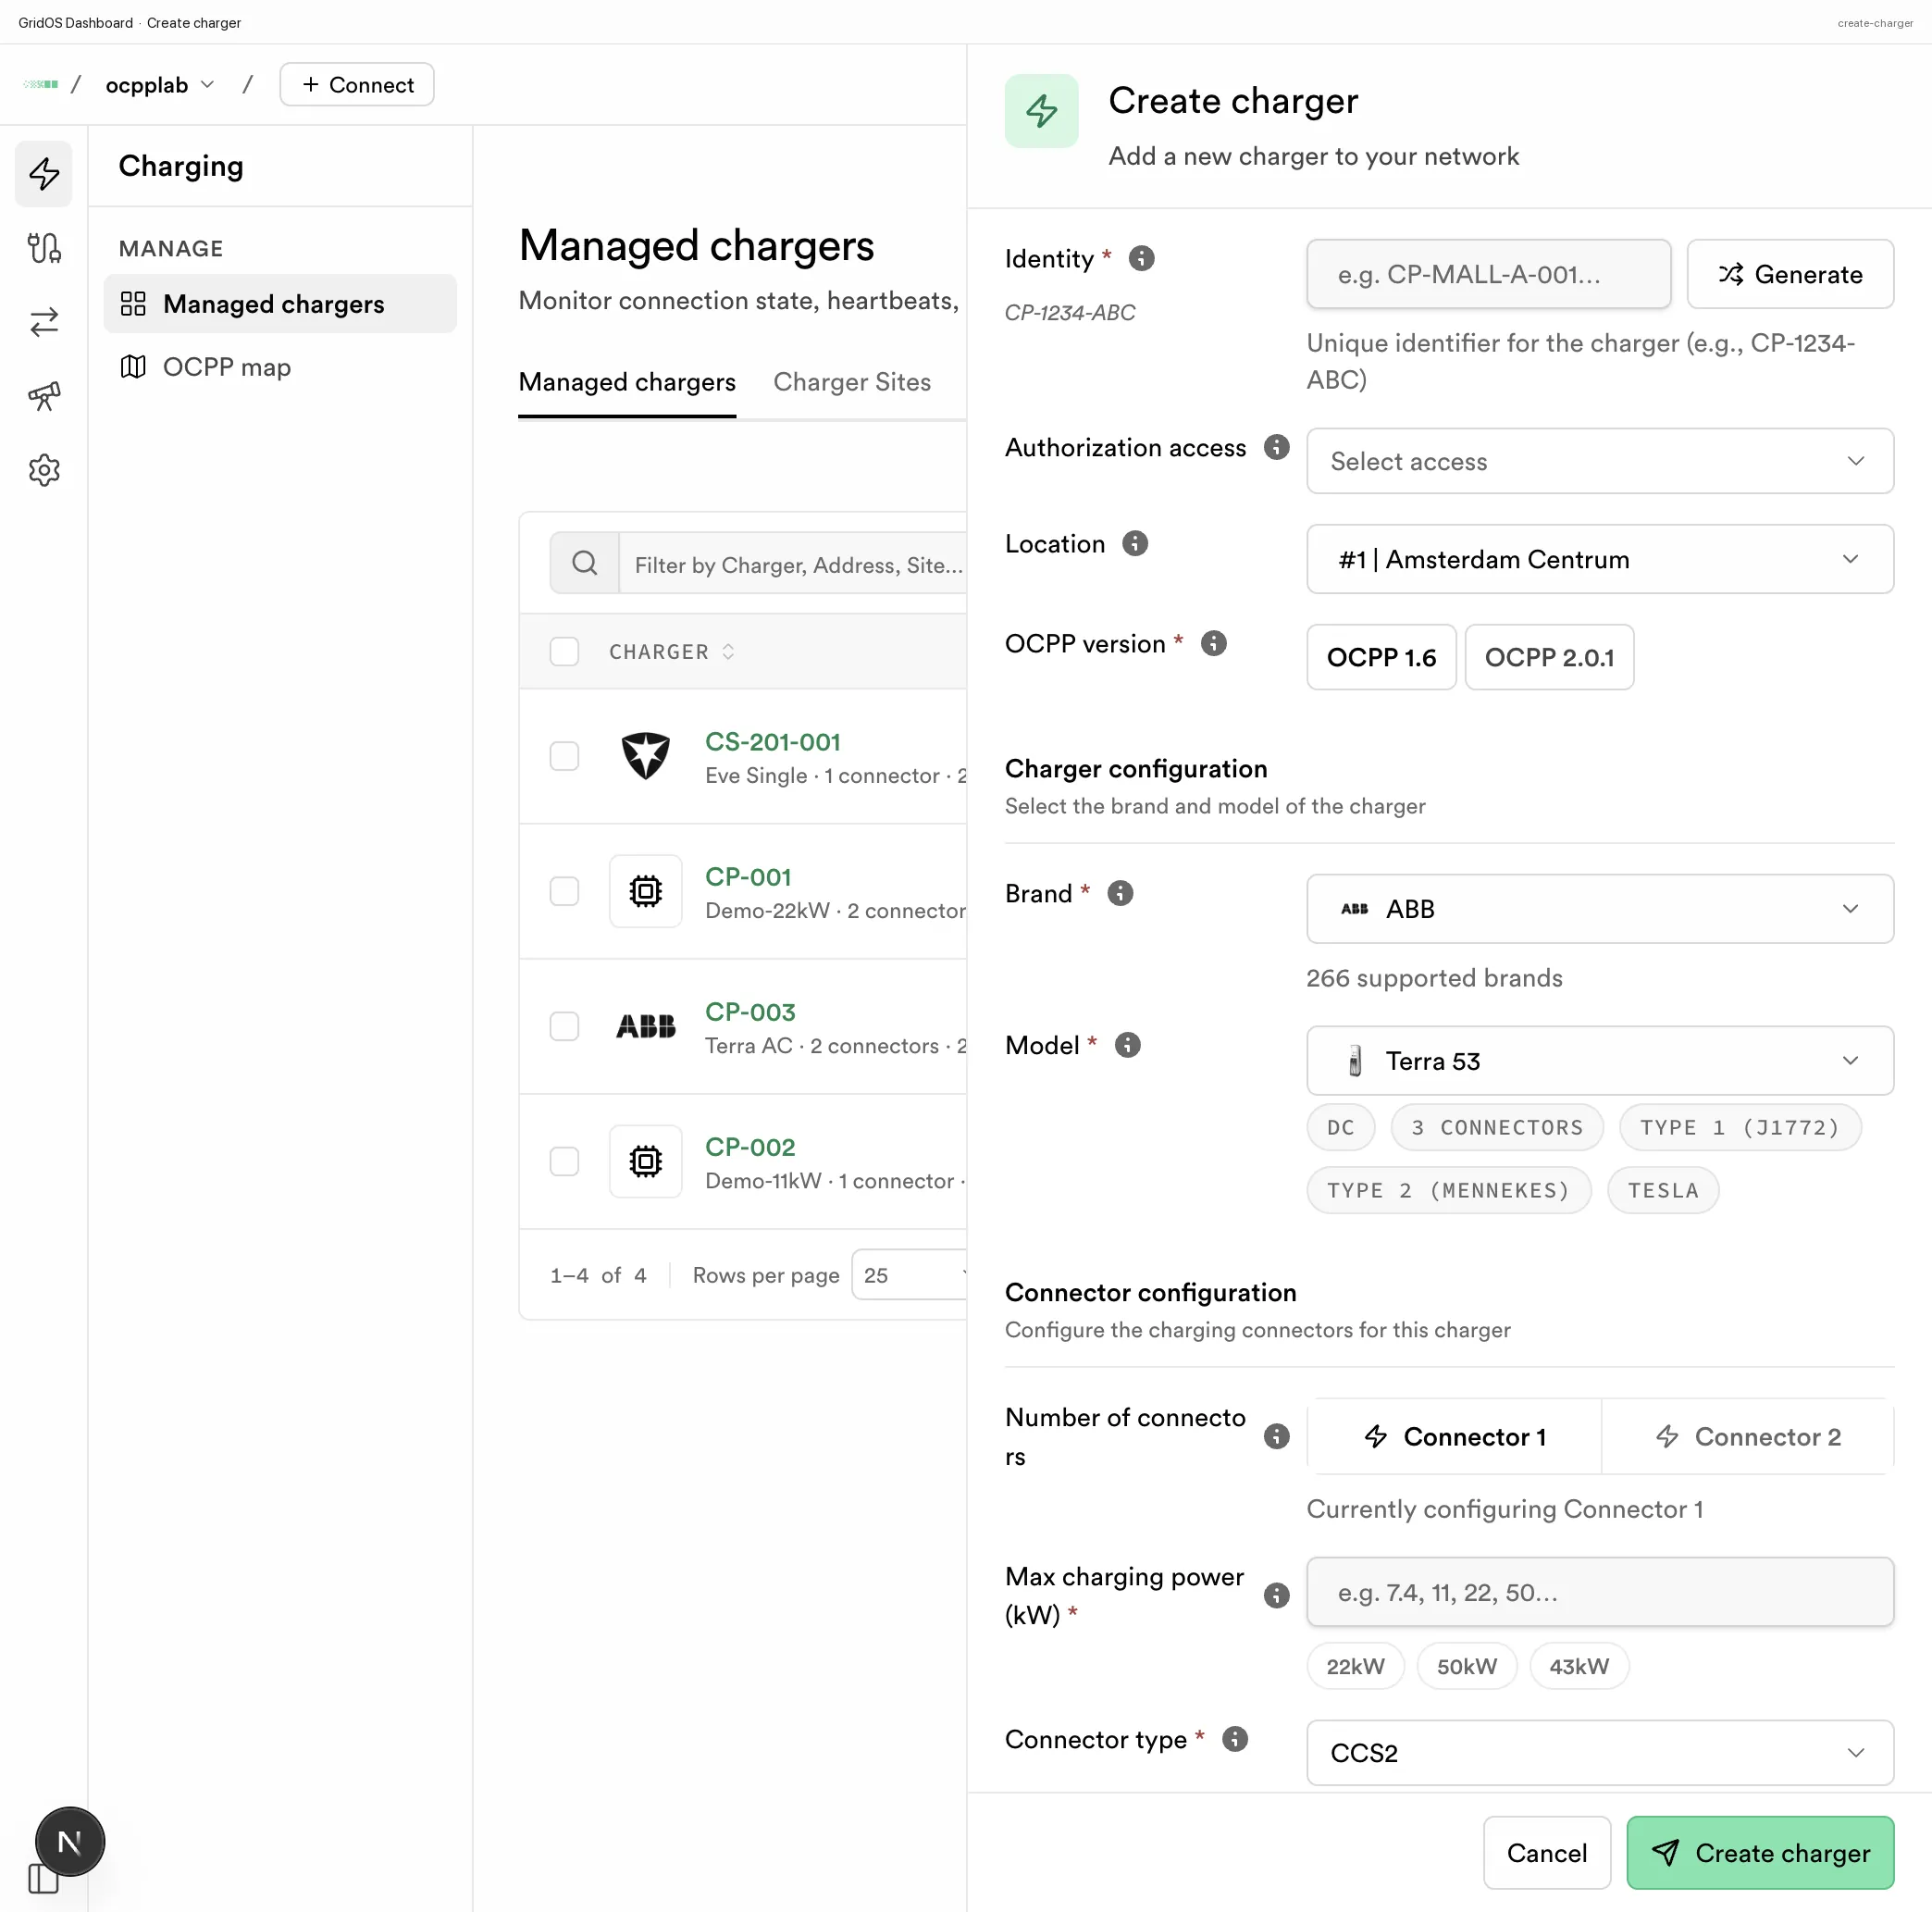
Create charger — sheet form for identity, access, OCPP version, brand, model, and connectors.
Before you start
- You are signed in to the Dashboard with permission to manage chargers
- You know whether the station speaks OCPP 1.6 or OCPP 2.0.1
- Optional: a site/location already exists if you want to assign the charger now
Never paste live OCPP passwords, OCPI tokens, or client certificates into tickets, chat, or public issues. Rotate anything that may have been exposed and use Dashboard or your secret store for operational credentials.
Open the form
Path: Charging → Managed chargers → Add charger (or equivalent create control).
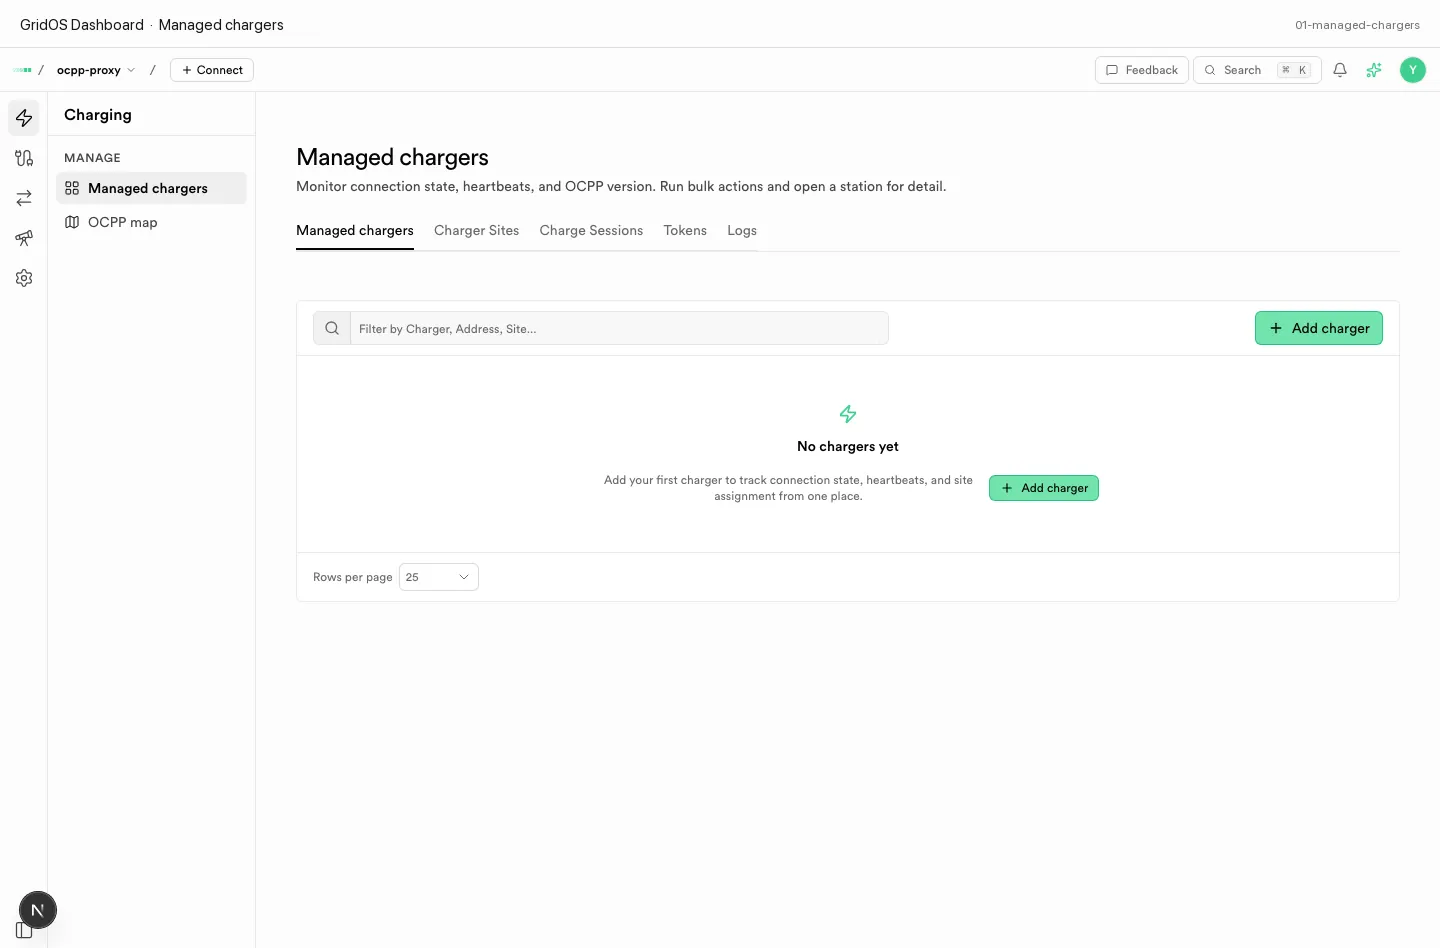
Managed chargers — open Create charger from this list.
Field reference
Use this table while you fill the sheet. Required fields are marked in the UI with *.
Identity
| Field | Required | What it is | How to set it |
|---|---|---|---|
| Identity | Yes | Unique charge point id used on the OCPP WebSocket path and in BootNotification. Must match the station config exactly (case-sensitive). Max length follows the platform limit (typically 36 characters). | Type a stable id such as CP-MALL-A-001, or use Generate for a random CP-XXXX-YYY style value. Prefer values you can print on the cabinet and put in the charger UI. |
Why it matters: If Identity in the Dashboard and the station’s charge point id differ, the charger never comes online.
Authorization access
| Field | Required | What it is | How to set it |
|---|---|---|---|
| Authorization access | No (can leave unset) | Who may authorize sessions on this charger. | Choose Public, Private, or Restricted to match site policy. |
| Value | Typical use |
|---|---|
| Public | Open network / public sites |
| Private | Fleet or employee-only |
| Restricted | Partner or limited allow-lists |
Location
| Field | Required | What it is | How to set it |
|---|---|---|---|
| Location | No | Charging site / place this station belongs to. Used for maps, filtering, and ops context. | Pick an existing site from the location control, or leave empty and assign later. |
OCPP version
| Field | Required | What it is | How to set it |
|---|---|---|---|
| OCPP version | Yes | Protocol the station will use with the CSMS. Drives routing, actions, and message shapes. | Select 1.6 or 2.0.1 to match the firmware / station setting. There is no silent default—you must choose. |
See Connect a charger after save to point the device at GridOS.
Brand and model
| Field | Required | What it is | How to set it |
|---|---|---|---|
| Brand | Yes | Manufacturer (vendor) of the hardware. Stored for inventory and clipped to OCPP vendor string limits. | Choose a brand from the supported list. |
| Model | Yes | Specific hardware model. Unlocks connector count and power presets when the catalog knows the model. | Select a model for the brand you chose. If no models appear, pick another brand or enter a catalog-supported pair. |
Brand and model are inventory metadata. They do not replace the OCPP identity.
Connector configuration
| Field | Required | What it is | How to set it |
|---|---|---|---|
| Number of connectors | Derived | How many physical connectors the model exposes. Often set from the model catalog. | Review after model selection; multi-connector models show per-connector tabs. |
| Connector tab | — | Which connector you are editing (Connector 1, Connector 2, …). | Switch tabs when the charger has more than one plug. |
| Max charging power (kW) | Yes | Maximum power output for the active connector, in kilowatts. | Enter a number (for example 7.4, 11, 22, 50) or use a power preset when the model provides one. |
| Connector type | Yes | Physical plug type (for example CCS, Type 2, CHAdeMO—options depend on model). | Select from the list for that connector. |
Steps
Set Identity
Enter a unique id or click Generate. Copy the same value into the charger’s OCPP station id field so BootNotification matches the Dashboard.
Set access and location
Choose Authorization access if you know the site policy. Assign Location when the site already exists so the station appears under the correct site on maps and filters.
Choose OCPP version
Select 1.6 or 2.0.1 exactly as configured on the hardware. Wrong version causes confusing rejects later even if the WebSocket connects.
Pick brand, model, and connectors
Select Brand and Model, then set Max charging power (kW) and Connector type for each connector tab the model exposes.
Save and check connection state
Submit the form. New chargers start as Never connected. Connection state is set by the platform after a real authenticated session and heartbeat—not by this form.
After you save
| Next action | Guide |
|---|---|
| Configure CSMS URL on the device | Connect a charger |
| Watch Online / Offline / Stale | Managed chargers |
| Use a simulator instead of hardware | Simulating a charger |
| See exceptions on the home page | Operations home |
Common errors
| Symptom | What to check |
|---|---|
| “Identity is required” | Empty identity field |
| Duplicate identity | Another charger already uses that id in the org |
| Value too long | Shorten identity, brand, or model to platform limits |
| OCPP version error | You must pick 1.6 or 2.0.1 |
| Max power invalid | Enter a numeric kW value (for example 22) |
| Charger stays Never connected | Device URL, TLS, and identity match—not the create form |